This post may contain affiliate links. When you purchase through links on our site, we may earn an affiliate commission.
As I sit on the sandy shores, the sun warming my skin and the sound of waves crashing in the background, I often find myself collecting little treasures that remind me of my beach adventures. These treasures, whether they are seashells, pieces of driftwood, or even a small piece of sea glass, hold memories that I cherish deeply. To preserve these moments and create something beautiful, I discovered the art of making beach shadow boxes.
This creative endeavor allows me to encapsulate my beach experiences in a unique and artistic way, transforming simple items into a stunning display that tells a story. Creating a beach shadow box is not just about crafting; it’s about reliving those joyful moments spent by the ocean. Each item I include in my shadow box serves as a reminder of the laughter shared with friends, the tranquility of watching the sunset, or the thrill of discovering a rare shell.
By arranging these items thoughtfully, I can create a visual narrative that captures the essence of my beach outings. In this article, I will guide you through the process of making your own beach shadow box, from selecting materials to displaying your finished piece, ensuring that your cherished memories are preserved for years to come.
Key Takeaways
- Beach shadow boxes are a creative way to display and preserve your beach memories and treasures.
- When choosing materials for your shadow box, consider using a deep frame, acid-free backing, and UV-protective glass to protect your items.
- Organize your beach treasures by theme or color to create a visually appealing arrangement in your shadow box.
- Get creative with arranging and decorating your shadow box by using sand, shells, and other beach-themed elements to enhance the display.
- To preserve and protect your beach memories, consider using a sealant or preservative for delicate items and keeping the shadow box out of direct sunlight.
Choosing the Right Materials for Your Shadow Box
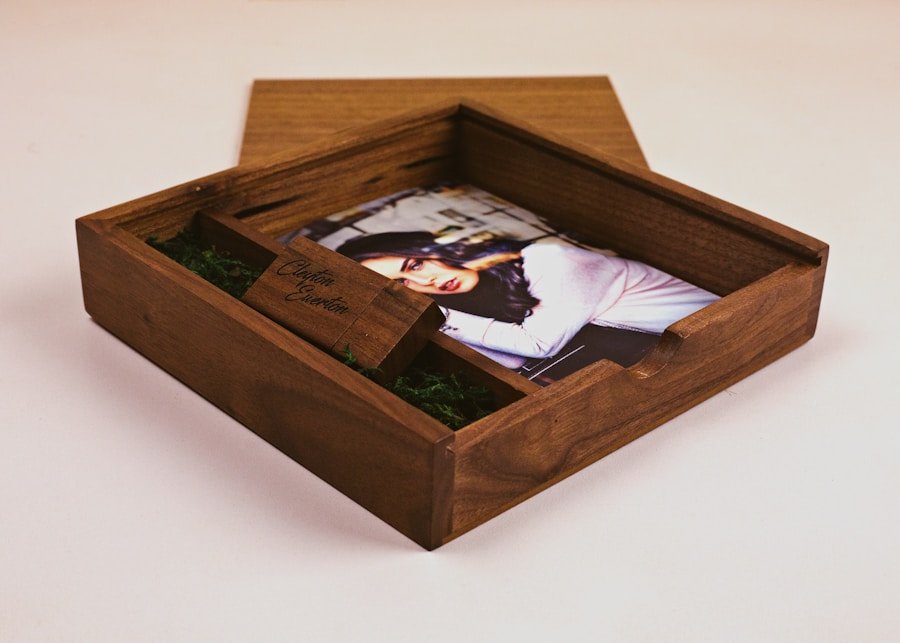
When it comes to creating a beach shadow box, selecting the right materials is crucial. I often start with a sturdy shadow box frame that can withstand the weight of my collected treasures. The frame should be deep enough to accommodate various items without them being squished together.
I prefer wooden frames for their natural aesthetic, which complements the beach theme beautifully. Additionally, I make sure to choose a frame with glass or acrylic front to protect my items while allowing them to be visible. Beyond the frame, I consider the background material for my shadow box.
A simple piece of colored cardstock or fabric can serve as a backdrop that enhances the overall look. I often opt for colors that evoke the beach—soft blues, sandy beiges, or even vibrant coral hues. These colors not only provide contrast but also help to highlight the treasures I’ve collected.
Furthermore, I gather additional materials such as glue, scissors, and decorative elements like ribbons or stickers that can add a personal touch to my creation.
Collecting and Organizing Your Beach Treasures
The process of collecting beach treasures is one of my favorite parts of creating a shadow box. Each trip to the beach becomes an adventure as I search for unique items that speak to me. I often find myself drawn to seashells of various shapes and sizes, each one telling its own story of the ocean.
Sometimes, I stumble upon interesting pieces of driftwood or colorful stones that catch my eye. I make it a point to collect only what resonates with me, ensuring that each item has significance. Once I return home, organizing my treasures becomes an enjoyable task.
I lay everything out on a table and take time to appreciate each piece before deciding which ones will make it into my shadow box. I often categorize them by size or color, which helps me visualize how they will fit together in the frame. This step is essential as it allows me to curate a collection that not only looks good but also feels cohesive.
By taking the time to organize my finds, I can create a more meaningful display that reflects my personal connection to each item.
Arranging and Decorating Your Shadow Box
| Aspect | Metrics |
|---|---|
| Number of items | 10 |
| Size of shadow box | 12 x 12 inches |
| Time taken to arrange | 30 minutes |
| Number of colors used | 5 |
| Number of layers | 3 |
Arranging the items in my shadow box is where the magic truly happens. I start by placing larger items at the back and gradually layer smaller pieces in front. This creates depth and dimension within the box, making it visually appealing.
I often experiment with different layouts before committing to one, moving items around until I find a configuration that feels just right. Sometimes, I even take photos of various arrangements to help me decide which one captures the essence of my beach memories best. In addition to arranging the treasures, decorating the shadow box adds an extra layer of personalization.
I love incorporating small decorative elements like starfish, sand dollars, or even tiny anchors that enhance the beach theme. These embellishments can be glued directly onto the background or placed strategically among the treasures for added interest. I also enjoy adding labels or captions that describe each item or share a memory associated with it.
This not only provides context but also invites viewers into my world of beach adventures.
Preserving and Protecting Your Beach Memories
Once my shadow box is complete, preserving and protecting it becomes a priority. The last thing I want is for my cherished memories to fade or deteriorate over time. To ensure longevity, I make sure to keep my shadow box out of direct sunlight, as UV rays can cause colors to fade and materials to degrade.
Instead, I find a suitable spot in my home where it can be admired without being exposed to harsh light. Additionally, I take care when cleaning my shadow box. A gentle dusting with a soft cloth is usually sufficient to keep it looking fresh without risking damage to the items inside.
If any items are particularly delicate or prone to wear, I consider using archival-quality materials for added protection. This attention to detail ensures that my beach memories remain vibrant and intact for years to come.
Displaying Your Beach Shadow Box
Choosing the Perfect Location
Finding the perfect spot to display my beach shadow box is an exciting part of the process. I often choose locations where it can be easily seen and appreciated—like on a mantelpiece or a wall shelf in my living room. The goal is to create a focal point that sparks conversation and invites others to share in my beach experiences.
Creating a Gallery Wall
Sometimes, I even create a small gallery wall featuring multiple shadow boxes from different trips, allowing me to showcase a variety of memories.
Considering Lighting
When displaying my shadow box, I also consider lighting. A well-lit area can enhance the beauty of the items inside and draw attention to the details I’ve carefully arranged. If possible, I position it near natural light sources while still being mindful of potential fading from direct sunlight. This balance allows me to enjoy my creation while ensuring it remains protected.
Creative Ideas for Personalizing Your Shadow Box
Personalizing my beach shadow box is where I can truly let my creativity shine. One idea I’ve embraced is incorporating photographs from my beach trips alongside my collected treasures. These images serve as visual reminders of the experiences behind each item and add an emotional layer to the display.
Whether it’s a candid shot of friends laughing by the shore or a serene sunset photo, these images help tell a more complete story. Another creative approach I’ve taken is using themed elements based on specific trips or locations. For instance, if I visited a tropical destination, I might include vibrant colors and exotic shells that reflect that environment.
Alternatively, if it was a family trip, I could incorporate small mementos like ticket stubs or postcards that evoke nostalgia. This level of personalization not only makes each shadow box unique but also allows me to relive those special moments every time I glance at it.
Conclusion and Tips for Making the Most of Your Beach Shadow Box
Creating a beach shadow box has become one of my favorite ways to preserve memories and express my creativity. Through careful selection of materials, thoughtful arrangement of treasures, and personal touches, I’ve been able to craft displays that resonate with both myself and those who view them. As I reflect on this process, there are several tips I’d like to share for anyone looking to embark on their own shadow box journey.
First and foremost, take your time during each step—collecting treasures, organizing them, and arranging them in your shadow box should be enjoyable experiences rather than rushed tasks. Allow yourself to savor each moment and let your creativity flow freely. Additionally, don’t hesitate to experiment with different layouts and decorations until you find what feels right for you; there are no strict rules in art!
Lastly, remember that your shadow box is a reflection of your personal experiences—embrace your unique style and let your memories shine through in every detail. In conclusion, creating a beach shadow box is not just about crafting; it’s about capturing moments that matter most to me and preserving them in an artistic way. Each time I look at my completed shadow box, I’m reminded of sun-soaked days by the ocean and the joy that comes from collecting memories along the way.
Whether you’re an experienced crafter or just starting out, this creative project offers an opportunity to celebrate your love for the beach while showcasing your individuality through artful expression.
If you’re looking for more creative ways to preserve your summer memories, check out this article on A to Z Cozy Corner’s website about creating personalized shadow boxes. These shadow boxes are a perfect way to display your favorite beach souvenirs and photos from your summer adventures. Click here to read more about how to make your own summer beach memory shadow boxes.
FAQs
What are summer beach memory shadow boxes?
Summer beach memory shadow boxes are decorative displays that showcase mementos and keepsakes from a beach vacation, such as seashells, sand, photos, and other beach-related items. They are typically created in a box frame with a glass front, allowing the items to be arranged and preserved in a visually appealing way.
How are summer beach memory shadow boxes made?
To make a summer beach memory shadow box, you will need a shadow box frame, beach-themed items such as seashells, sand, and photos, as well as glue, scissors, and any additional decorative elements. The items are arranged and secured inside the shadow box frame, creating a personalized and visually appealing display.
What can be included in a summer beach memory shadow box?
Items that can be included in a summer beach memory shadow box include seashells, sand, beach glass, photos, postcards, tickets, and any other mementos from a beach vacation. These items can be arranged creatively to capture the memories and experiences of the beach trip.
How can summer beach memory shadow boxes be displayed?
Summer beach memory shadow boxes can be displayed on a wall, shelf, or tabletop, allowing the memories of a beach vacation to be showcased and enjoyed. They can be hung individually or grouped together to create a beach-themed gallery wall.
Are summer beach memory shadow boxes customizable?
Yes, summer beach memory shadow boxes are highly customizable. You can personalize them with specific items from your beach vacation, as well as add decorative elements such as ribbons, stickers, or themed embellishments to enhance the display.
 using WordPress and
No responses yet