
This post may contain affiliate links. When you purchase through links on our site, we may earn an affiliate commission.
Driftwood wind chimes have a unique charm that captures the essence of nature and the soothing sounds of the outdoors. As I sit on my porch, listening to the gentle tinkling of chimes swaying in the breeze, I am reminded of the beauty that can be created from simple, natural materials. These handcrafted pieces not only serve as decorative elements for my home or garden but also evoke a sense of tranquility and connection to the environment.
The combination of wood and metal creates a harmonious blend that resonates with the spirit of the sea and the serenity of nature. Creating driftwood wind chimes is an enjoyable and fulfilling project that allows me to express my creativity while embracing sustainability. By repurposing driftwood, I am not only giving new life to discarded materials but also contributing to a more eco-friendly lifestyle.
Each piece of driftwood tells its own story, shaped by the elements and time, making every wind chime a unique work of art. In this article, I will guide you through the process of finding the right driftwood, selecting chimes, assembling your creation, and ultimately enjoying the soothing sounds it produces.
Key Takeaways
- Driftwood wind chimes are a beautiful and natural addition to any outdoor space, creating a soothing and tranquil atmosphere with their gentle sounds.
- When finding and choosing the right driftwood for your wind chime, look for pieces that are sturdy, weathered, and have interesting shapes and textures.
- Selecting the perfect chimes involves considering the material, size, and tone to complement the driftwood and create the desired sound.
- Preparing and assembling the wind chime requires drilling holes in the driftwood and attaching the chimes with durable string or wire, ensuring they are evenly spaced for balanced sound.
- Adding decorative elements such as shells, beads, or feathers can personalize your driftwood wind chime and enhance its natural beauty.
Finding and Choosing the Right Driftwood
The journey begins with finding the perfect driftwood. I often take leisurely walks along beaches, riverbanks, or lakeshores, keeping an eye out for interesting pieces that have been shaped by water and time. The beauty of driftwood lies in its organic forms, which can range from smooth and polished to rugged and weathered.
When selecting driftwood for my wind chimes, I look for pieces that are not only visually appealing but also sturdy enough to withstand outdoor conditions. I pay attention to the size and shape of each piece, as these factors will influence the overall design of my wind chime. Longer, thinner pieces can create a more delicate look, while thicker, chunkier pieces provide a rustic feel.
I also consider the color and texture of the wood; some pieces may have beautiful grains or unique markings that add character to my creation. Once I find a few promising candidates, I make sure to clean them thoroughly to remove any sand, dirt, or salt residue before using them in my project.
Selecting the Perfect Chimes
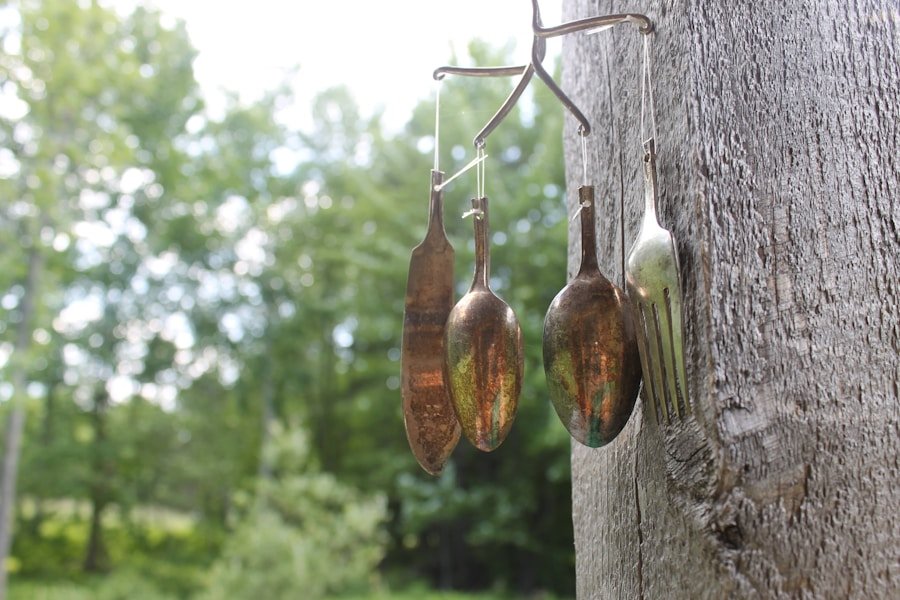
Choosing the right chimes is just as important as selecting the driftwood itself. The sound produced by wind chimes can vary significantly based on the materials used and their design. I often explore different types of chimes made from metal, bamboo, or glass to find those that resonate with me.
Metal chimes tend to produce a bright, clear sound that carries well in the wind, while bamboo chimes offer a softer, more mellow tone. When selecting chimes for my driftwood wind chime project, I consider how they will complement the natural beauty of the driftwood. I enjoy mixing materials to create a more dynamic soundscape; for instance, pairing metal chimes with wooden elements can produce an interesting contrast.
Additionally, I think about the length of the chimes; longer chimes typically create deeper tones, while shorter ones produce higher pitches. By experimenting with different combinations, I can create a wind chime that not only looks beautiful but also sounds delightful.
Preparing and Assembling the Wind Chime
| Task | Time Taken (minutes) | Materials Used |
|---|---|---|
| Sorting and arranging chime tubes | 10 | Chime tubes |
| Attaching chime tubes to the base | 15 | Base, chime tubes, screws |
| Adding decorative elements | 20 | Beads, strings, hooks |
| Assembling the top hanger | 10 | Wire, pliers |
Once I have gathered my driftwood and selected my chimes, it’s time to prepare and assemble my wind chime. I start by determining how I want to arrange the driftwood pieces. I often lay them out on a flat surface to visualize the final design before committing to any permanent attachments.
This step allows me to experiment with different configurations until I find one that feels balanced and aesthetically pleasing. Next, I drill holes into the driftwood where I plan to attach the chimes. It’s essential to use a drill bit that matches the size of my chosen string or wire so that everything fits securely.
After drilling, I thread the chimes onto strings or wires and tie them off at appropriate lengths to create a cascading effect. I then attach these strings to the driftwood base using strong knots or adhesive, ensuring that everything is secure enough to withstand outdoor conditions. The assembly process is where my vision truly comes to life, as I see how each element works together harmoniously.
Adding Decorative Elements
To elevate my driftwood wind chime further, I love adding decorative elements that reflect my personal style. This could include beads, shells, or even small charms that resonate with me or hold special meaning. Incorporating these embellishments not only enhances the visual appeal but also adds layers of texture and color to my creation.
I often choose materials that complement the natural tones of the driftwood and chimes. For instance, if I’m using light-colored wood, I might opt for vibrant beads or shells in contrasting colors to create a striking visual effect. Additionally, I sometimes paint or stain certain parts of the driftwood to add depth or highlight specific features.
The key is to maintain a balance between decoration and simplicity; after all, the beauty of driftwood lies in its natural form.
Hanging and Displaying Your Driftwood Wind Chime

Once my wind chime is complete, it’s time to find the perfect spot to hang it. I usually look for areas where there is enough airflow to allow the chimes to move freely and produce sound. A porch, balcony, or garden area with gentle breezes is ideal for showcasing my creation.
When hanging my wind chime, I ensure it is securely fastened so that it won’t be easily blown away by strong winds. I also consider how my wind chime will interact with its surroundings. Placing it near plants or flowers can create a beautiful natural setting that enhances its charm.
Additionally, I enjoy hanging my wind chime at different heights to see how it looks from various angles. The way sunlight filters through the materials can create stunning visual effects throughout the day.
Maintenance and Care Tips
To keep my driftwood wind chime looking beautiful and functioning well over time, I make sure to perform regular maintenance. Since it will be exposed to outdoor elements like rain and sun, it’s essential to check for any signs of wear or damage periodically. If I notice any loose strings or frayed edges, I take immediate action to repair them before they become bigger issues.
Cleaning is another important aspect of maintenance. I gently wipe down the driftwood and chimes with a damp cloth to remove dust and debris that may accumulate over time. If necessary, I use a mild soap solution for deeper cleaning but ensure everything is thoroughly dried afterward to prevent mold or deterioration.
By taking these simple steps, I can enjoy my driftwood wind chime for many seasons to come.
Enjoying the Tranquil Sounds of Your Wind Chime
The ultimate reward for my efforts comes when I finally sit back and enjoy the tranquil sounds produced by my driftwood wind chime. As the breeze flows through the chimes, creating a symphony of soft melodies, I find myself enveloped in a sense of peace and relaxation. The gentle tinkling serves as a reminder of nature’s beauty and simplicity, allowing me to escape from daily stresses.
I often find myself drawn to my wind chime during moments of reflection or meditation. The soothing sounds create an atmosphere conducive to mindfulness, helping me connect with my surroundings on a deeper level. Whether it’s during quiet mornings with a cup of tea or peaceful evenings watching the sunset, my driftwood wind chime has become an integral part of my outdoor experience—an embodiment of creativity and tranquility that brings joy into my life every day.
If you’re looking to add some cozy charm to your outdoor space with Summer driftwood wind chimes, you may also be interested in checking out A to Z Cozy Corner’s blog. They offer a variety of articles on home decor and lifestyle tips that can help you create a warm and inviting atmosphere in your home. One article that may catch your eye is their “Starting the New Year Healthy: Wellness Guide 2025,” which provides helpful tips and resources for maintaining a healthy lifestyle. You can find more inspiration and ideas for creating a cozy and welcoming home by visiting A to Z Cozy Corner’s blog.
FAQs
What are summer driftwood wind chimes?
Summer driftwood wind chimes are decorative outdoor ornaments made from pieces of driftwood and various materials such as shells, beads, and metal tubes. They are designed to create soothing sounds when the wind blows through them.
How are summer driftwood wind chimes made?
Summer driftwood wind chimes are typically made by attaching various objects to a piece of driftwood or a metal ring using string, wire, or fishing line. The objects are arranged in a way that allows them to move and create sound when the wind blows.
What materials are used to make summer driftwood wind chimes?
Materials commonly used to make summer driftwood wind chimes include driftwood, shells, beads, metal tubes, feathers, and other natural or decorative elements. The choice of materials can vary depending on the desired aesthetic and sound.
How can summer driftwood wind chimes be hung?
Summer driftwood wind chimes can be hung from a tree branch, porch overhang, or any other outdoor structure using a durable string or wire. It’s important to ensure that they are securely attached to prevent them from falling and causing damage.
What are the benefits of summer driftwood wind chimes?
Summer driftwood wind chimes not only add a decorative touch to outdoor spaces but also create a relaxing and peaceful atmosphere with their gentle, melodic sounds. They can also serve as a natural deterrent to birds and other wildlife that may disturb gardens or outdoor areas.
 using WordPress and
No responses yet