This post may contain affiliate links. When you purchase through links on our site, we may earn an affiliate commission.
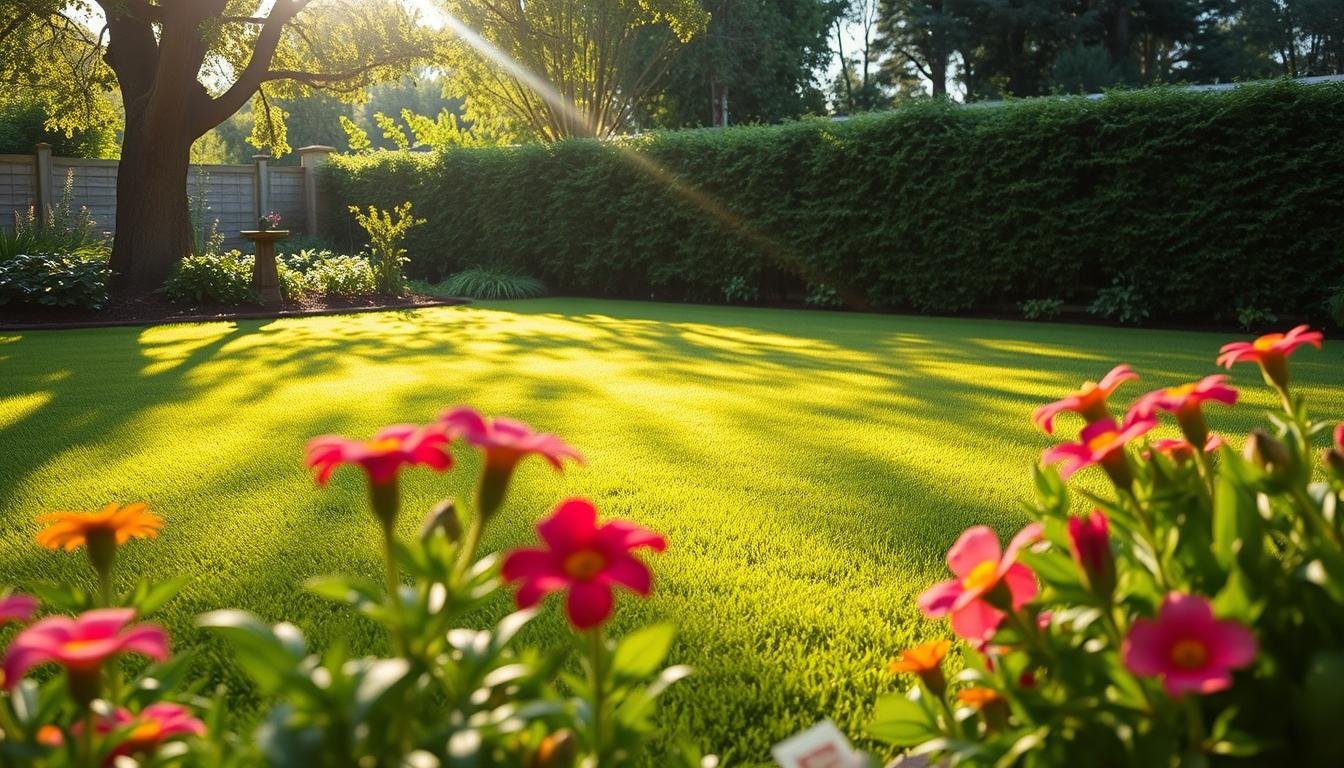
What if your dream yard doesn’t require endless watering, mowing, or costly upkeep? I asked myself this exact question while staring at my patchy, lifeless backyard. Like many homeowners, I craved a vibrant outdoor space but dreaded the maintenance—until I discovered artificial turf.
Last summer, I transformed my barren dirt plot into a lush retreat inspired by classic English gardens—without hiring professionals. The secret? Detailed planning and creative design. I studied real-life projects where others saved thousands by tackling installations themselves. Their stories proved a stunning lawn isn’t just for the wealthy.
My journey began with measuring the area and sketching layouts. I prioritized durability and natural aesthetics, blending synthetic materials with stone pathways. The result? A space that looks professionally designed but cost half the price. Best of all, weekends are now for relaxing—not weeding.
Key Takeaways
- Artificial turf offers a low-maintenance alternative to traditional lawns.
- Strategic planning reduces costs while achieving high-end visual appeal.
- Combining synthetic materials with hardscape features enhances durability.
- Real-life project insights provide actionable steps for DIY success.
- Initial backyard conditions influence design choices and material needs.
Planning and Designing My Garden Landscape
Mapping out my outdoor space felt like solving a puzzle where every piece had to fit perfectly. I started by sketching multiple layouts on grid paper, measuring the backyard to scale. This helped me visualize curved pathways and a cozy patio area without overcrowding the design.
https://www.youtube.com/watch?v=FJawbDMDPYg
Sketching the Layout and Paving Ideas
Drainage became my top priority. I layered fabric weed barriers beneath flume gravel to prevent erosion. A 3-inch base of paver sand created a stable surface for stepping stones. Curved edges around the seating area softened the look while keeping materials in place.
Budgeting and Cost Considerations
Comparing prices saved me nearly $2,000. Professional quotes averaged $8 per square foot, but my way of sourcing materials cut costs to $3.50. I chose crushed granite over pricier pavers and reused existing rocks for borders. Even minor choices mattered—like opting for UV-resistant fabric to avoid replacement costs.
Local HOA rules added unexpected hurdles. Their guidelines required specific plant-to-hardscape ratios, which I incorporated into revised sketches. Balancing these restrictions with my vision took patience, but the result felt worth every adjustment.
DIY Faux Grass for Garden Landscapes: Tools, Materials, and Preparation
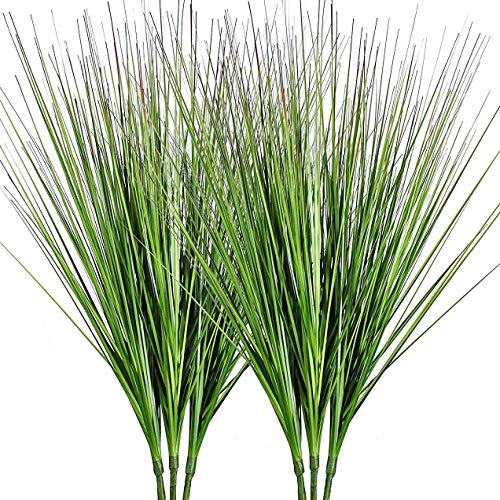
Quality supplies made all the difference in creating a resilient outdoor area. I spent weeks researching synthetic turf options, learning that blade density and backing thickness determine longevity. A local supplier let me compare samples side by side—crucial for spotting realistic textures.

Choosing Quality Artificial Turf
Three factors guided my selection: UV resistance, drainage holes, and stitch rate. I rejected two cheaper rolls after finding uneven coloring along the edges. The winning choice had 80-ounce backing and dual-layer latex—key for handling foot traffic across multiple landscape zones.
Essential Installation Tools and Safety Tips
My garage became a staging area for:
- Sharp utility knives (replace blades every 15 cuts)
- Landscape spikes with washers for secure edges
- Seam tape designed for outdoor temperature swings
Working with synthetic materials taught me to always wear gloves when cutting. One slip with the carpet kicker left a bruise—lesson learned! I scheduled tasks in 90-minute blocks to maintain focus during precise alignment work.
Test-fitting pieces before final placement saved hours later. Rotating rolls to match blade direction created invisible seams, while leaving ¼-inch space between sections prevented buckling. These small steps transformed separate pieces into a unified surface.
Prepping the Outdoor Space for Installation
Preparing the ground proved tougher than expected. My backyard hid surprises under its patchy surface—tree roots, buried rocks, and stubborn clay soil. This phase demanded patience but laid the foundation for everything to come.
Clearing Existing Grass and Debris
I attacked the overgrown mess with a rented sod cutter and shovel. The concrete slab from an old shed required a pry bar and sledgehammer. After hauling away three truckloads of debris, I marked the project boundaries with twine and stakes. A laser level helped ensure consistent depth—crucial for maintaining 4 inches of clearance across the entire home landscape area.
Installing the Weed Barrier for Optimal Drainage
Laying the geotextile fabric felt like wrapping a giant present. I overlapped seams by 12 inches, securing them with landscape tape. Pro tip: use a spray adhesive on corners to prevent shifting. This barrier became my silent ally against weeds while letting rainwater drain freely.
Keeping materials organized saved hours. I stored tools in labeled bins and pre-cut tape strips for quick access. Every decision here—from precise measurements to choosing heavy-duty adhesive—directly impacted how well the synthetic surface would hold its place over time.
Establishing a Solid Base with Gravel and Sand
The secret to a lasting artificial lawn lies beneath the surface. After clearing debris, I focused on creating a foundation that would withstand weather changes and foot traffic. This stage turned out to be more strategic than I’d imagined—every millimeter mattered.

Applying Flume Gravel and Paver Base Sand
Three tons of flume gravel arrived on pallets, which I spread using a metal rake. Working in sections, I maintained a direction parallel to the house to ensure consistent depth. A 2×4 board became my leveling tool—dragging it across the surface revealed low spots needing extra material.
Next came paver base sand. I shoveled it over the gravel like frosting on a cake, then misted it lightly to help settling. This dual-layer approach created what landscapers call a “forgiving base”—essential for preventing dips under synthetic surfaces.
Using a Tamper for a Smooth, Level Surface
My rented plate compactor weighed 90 pounds but felt heavier after 40 minutes. The machine’s vibrations exposed three uneven zones requiring rework. For tight corners, I switched to a hand tamper, checking progress with a 4-foot level.
Alignment of grass blades later depended on this prep work. I marked the direction for installation using chalk lines, knowing mismatched angles would create visible seams. Final checks involved walking the entire along length while scanning for subtle slopes—a coffee cup roll test proved surprisingly effective!
Precise Turf Installation and Seam Alignment
This phase demanded surgical precision – one misaligned edge could unravel weeks of prep work. My garage floor became a cutting studio where synthetic rolls transformed into custom puzzle pieces.

Cutting the Turf to Size with Care
I marked cuts using chalk lines and painter’s tape. Curves around my patio required three test fittings before final trimming. A fresh utility knife blade made clean slices through the dense backing.
Key lessons emerged:
- Cut from the backside for better control
- Leave 1.5″ extra material for adjustments
- Label each piece with masking tape arrows showing blade direction
Securing Seams and Aligning Grass Blades
Seam tape became my secret weapon. I applied outdoor-grade adhesive in zigzag patterns, then pressed the tape firmly. Matching the flow of synthetic fibers required rotating sections like compass needles.
| Technique | Tool | Time per 10ft |
|---|---|---|
| Blade Alignment | Stiff Bristle Brush | 15 minutes |
| Seam Bonding | 6″ Seam Roller | 8 minutes |
| Edge Securing | 7″ Lawn Staples | 5 minutes |
I spaced staples 6″ apart along borders, hammering them flush. For tricky corners near the yard fence, I used galvanized nails with rubber washers. The final brush-up with a power broom made blades stand uniformly – no telltale seams in sight.
Pro tip: Work early morning when materials are cool. Midday heat caused slight expansion that later created puckers. Three minor re-dos taught me patience pays in installation perfection.
Enhancing Landscape Aesthetics with Edging and Pavers
Adding pavers around the synthetic surface was like framing a masterpiece—it unified every element. I wanted borders that could withstand weather changes while elevating the space’s visual harmony. This step transformed functional areas into intentional design features.
Securing Borders That Last
I laid concrete pavers using 2×4 boards as spacers to maintain exact gaps. Filling joints with polymeric sand created a lock-tight seal against shifting. The process demanded:
- Dry-fitting pieces before final placement
- Checking level every 3 feet
- Tamping edges with a rubber mallet
Landscaping fabric beneath the pavers prevented weed growth while allowing drainage. I extended it 6 inches beyond the border to blend with surrounding areas. This dual-purpose solution saved hours of future maintenance.
“A well-edged space doesn’t just look complete—it feels intentional.”
Blending Function and Beauty
Boxwood shrubs and lavender plants softened the hardscape edges. I chose varieties that thrive in local soil, spacing them to avoid overcrowding as they mature. Colorful annuals added pops of red and yellow near seating areas.
| Enhancement | Materials Used | Kid-Friendly Benefit |
|---|---|---|
| Paver Borders | Concrete slabs + Polymeric sand | Prevents tripping hazards |
| Planters | Weather-resistant cedar boxes | Defines play zones |
| Path Lighting | Solar-powered stakes | Improves evening visibility |
Rounded paver corners proved safer for kids chasing balls across the yard. The final brush-up with a stiff broom aligned synthetic blades with natural elements seamlessly. What began as a practical step became my favorite design detail.
Ongoing Care, Maintenance, and Aesthetic Touches
Keeping my synthetic lawn vibrant requires consistent effort—a small price for year-round beauty. Through trial and error, I developed routines that preserve the material’s texture and color while accommodating active use by my dog and family.
Brushing Basics and Infill Refresh
Weekly brushing with a stiff-bristle broom became my secret weapon. This simple process lifts flattened blades and redistributes Envirofill infill. I focus on high-traffic zones where my dog plays, using cross-brushing motions to prevent matting.
Every spring, I add fresh infill to maintain cushioning. A 50-pound bag covers 500 square feet in my experience. This step combats compaction from winter rains and keeps the surface cool during summer heat.
Seasonal Strategies for Lasting Appeal
Fall brings leaf cleanup—a quick job with a plastic rake. I inspect seams monthly, pressing loose edges with nails dipped in outdoor adhesive. For pet accidents, a vinegar-water mix neutralizes odors without harming the material.
| Task | Frequency | Tools Needed |
|---|---|---|
| Blade Brushing | Weekly | Poly broom |
| Infill Top-Up | Annual | Envirofill, spreader |
| Seam Check | Monthly | Adhesive, mallet |
| Deep Clean | Seasonal | Leaf blower, mild soap |
Small design updates keep the space feeling fresh. Last summer, I edged the play area with smooth river rocks—a practical upgrade that contains toy clutter. These tweaks prove maintenance isn’t just chores—it’s creative stewardship of your outdoor haven.
Conclusion
Looking back at my yard transformation, every drop of sweat taught me something valuable. From sketching layouts to pounding seams into place, the process blended creativity with precision. Meticulous care in aligning synthetic materials created invisible joints—a detail that still impresses neighbors.
The real win? Spending weekends enjoying my space instead of maintaining it. By tackling each phase methodically—base prep, turf cutting, and border installation—I saved nearly 60% versus professional quotes. Those hours spent brushing blades and adjusting seams paid off in lasting visual harmony.
If you’re considering a similar project, let my trial-and-error insights guide you. Start small, prioritize proper drainage, and invest in UV-resistant materials. Regular care keeps synthetic surfaces looking pristine for years, while smart design choices elevate functionality.
Have questions about your specific space? I’m happy to share hard-won tips—just drop a comment below. Your dream outdoor retreat might be closer than you think.
FAQ
How do I choose the best artificial turf for my yard?
What’s the most important step before laying artificial grass?
Can I install synthetic turf over concrete or pavers?
How do I keep seams from showing after installation?
Will my dog’s urine damage the artificial lawn?
How often should I maintain my synthetic grass?
Can I add paver edging after installing the turf?


 using WordPress and
No responses yet