This post may contain affiliate links. When you purchase through links on our site, we may earn an affiliate commission.
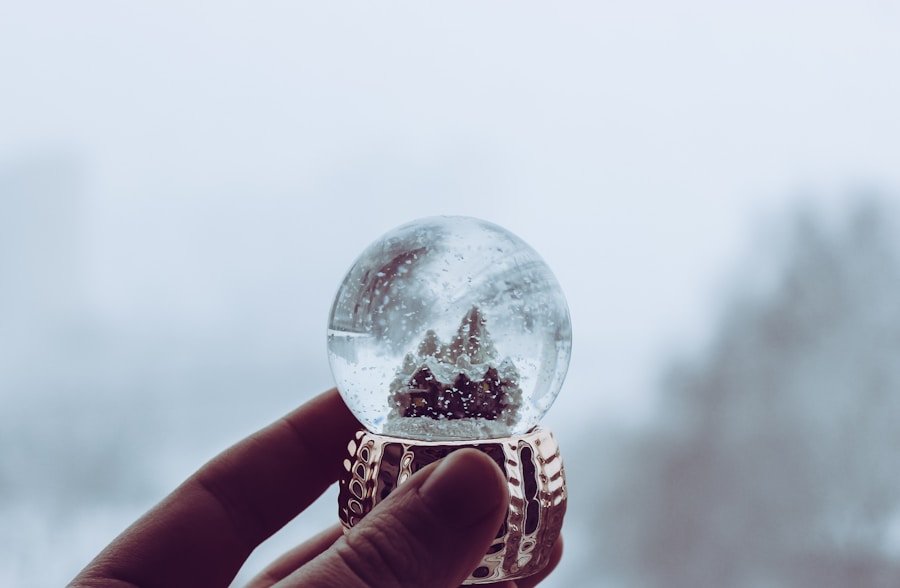
When embarking on the delightful journey of creating a snow globe, the first step is selecting the right container. The container serves as the heart of the snow globe, encapsulating the entire scene and allowing it to come to life. I often find myself drawn to glass jars, as they provide a classic and elegant look.
The transparency of glass allows for an unobstructed view of the miniature world I am about to create. I usually opt for jars with a wide mouth, as this makes it easier to arrange the elements inside and ensures that I can easily access my creation for any adjustments. However, I also enjoy exploring unconventional options.
Vintage teacups or mason jars can add a unique flair to my snow globe. Each container has its own character, and I love how it can influence the overall aesthetic of my project. When choosing a container, I consider not only its size but also its shape and design.
A beautifully ornate lid can enhance the charm of my snow globe, while a simple, rustic jar might evoke a more homey feel. Ultimately, the right container sets the stage for the enchanting scene I am about to craft.
Key Takeaways
- Choose a clear, sturdy container for your snow globe to showcase your winter scene effectively.
- Select a winter scene that is visually appealing and fits well within the dimensions of your container.
- Create the snow effect using artificial snow or white glitter for a realistic and magical touch.
- Add a touch of magic with glitter by sprinkling it over the winter scene to enhance the snow globe’s visual appeal.
- Secure the scene in place by using waterproof glue or silicone sealant to prevent any movement or leakage.
Selecting the Perfect Winter Scene
Finding Inspiration
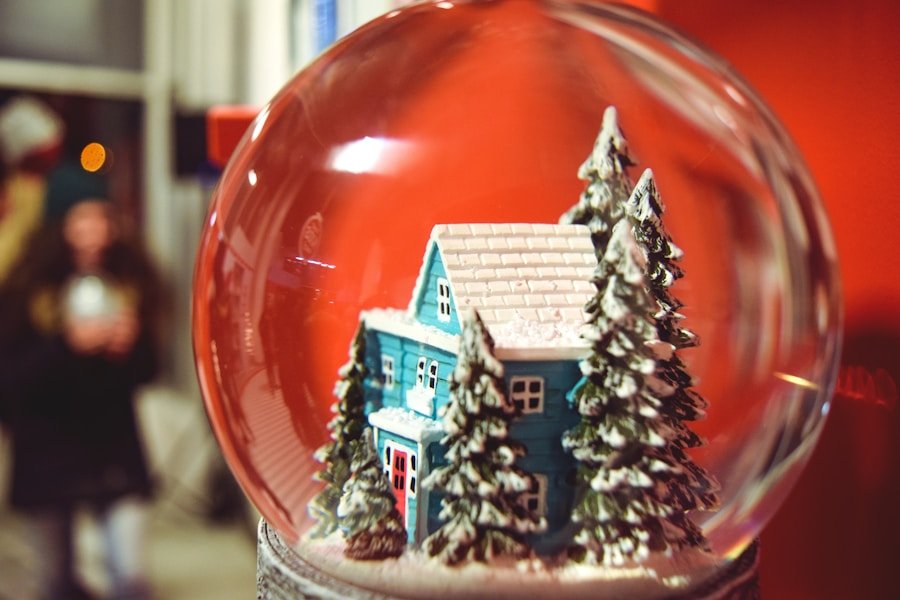
Once I have my container in hand, the next step is selecting the perfect winter scene to encapsulate within it. This is where my imagination truly takes flight. I often find inspiration in winter landscapes, cozy cabins, or even whimsical characters like snowmen and woodland creatures.
Creating a Personal Connection
The key is to create a scene that resonates with me personally, evoking memories or feelings associated with wintertime. I might think back to childhood memories of building snow forts or sipping hot cocoa by the fireplace, and I strive to capture that essence in my design.
Adding Depth and Dimension
As I gather materials for my scene, I pay close attention to scale and proportion. Miniature figurines and tiny trees can help create depth and interest within the globe. I enjoy mixing different textures, such as soft faux snow and shiny ornaments, to add dimension to my creation. Sometimes, I even incorporate small LED lights to give my scene a warm glow, making it feel even more magical.
The process of selecting and arranging these elements is both creative and therapeutic, allowing me to immerse myself in the spirit of winter.
Creating the Snow Effect
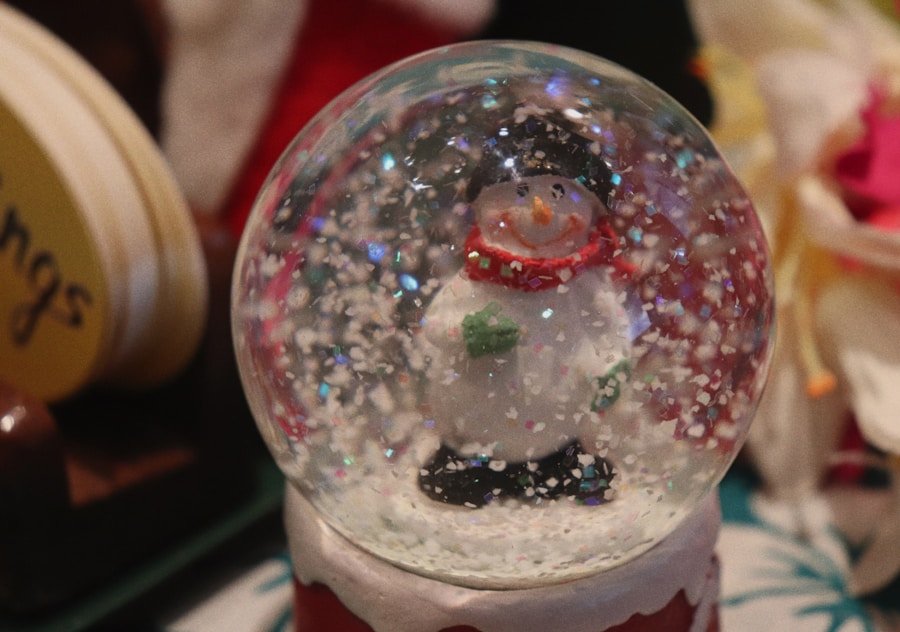
With my winter scene taking shape, I turn my attention to creating the snow effect that will bring it all together. The snow is what transforms a simple diorama into a captivating snow globe, and there are various methods I can use to achieve this effect. One of my favorite techniques involves using glycerin mixed with water to create a thick liquid that slows down the fall of the snowflakes.
This not only enhances the visual appeal but also adds a sense of realism to my creation. I often experiment with different types of “snow” materials as well. From fine glitter to larger flakes, each option offers a unique look and feel.
Sometimes, I even mix in small beads or sequins for added sparkle. The key is to strike a balance between enough snow to create a magical effect without overwhelming the scene inside. As I pour the snow into my globe, I feel a sense of excitement building—this is where my vision truly begins to come alive.
Adding a Touch of Magic with Glitter
| Glitter Type | Color | Size | Price |
|---|---|---|---|
| Fine Glitter | Silver | 0.008 inch | 5.99 |
| Chunky Glitter | Gold | 0.04 inch | 7.99 |
| Holographic Glitter | Rainbow | 0.015 inch | 6.99 |
To elevate my snow globe from charming to enchanting, I love adding a touch of glitter. Glitter has an undeniable ability to catch the light and create a sense of wonder, making it an essential component of my design process. I often choose iridescent or holographic glitter for its ability to reflect various colors, adding depth and dimension to the snowy landscape I’ve created.
When sprinkling glitter into my snow globe, I take care not to overdo it; a little goes a long way in creating that magical effect. The way it dances through the water as it swirls around my winter scene is mesmerizing. Sometimes, I even mix different sizes of glitter for added texture—fine glitter can mimic delicate snowflakes, while larger pieces can represent heavier snowfall.
This layering technique enhances the overall visual experience and makes my snow globe feel like a tiny world filled with enchantment.
Securing the Scene in Place
Once I’m satisfied with the snow effect and glitter, it’s time to secure my scene in place. This step is crucial because I want everything to remain intact when the globe is shaken or moved. I typically use a strong adhesive like hot glue or epoxy to attach my figurines and other elements firmly to the base of the container.
This ensures that they won’t shift or float away when the globe is in use. I take my time during this process, carefully positioning each element before applying glue. It’s important for me that everything looks just right; after all, this is my creation!
Once everything is securely in place, I allow it to dry completely before moving on to the next step. This patience pays off when I see how beautifully everything comes together in the final product.
Sealing the Snow Globe
Preventing Leaks and Ensuring Durability
With my scene securely anchored, I now focus on sealing the snow globe. This step is essential for preventing leaks and ensuring that my creation remains intact for years to come. Depending on the type of container I’ve chosen, sealing methods may vary slightly.
Sealing Methods
For glass jars with metal lids, I often apply a layer of silicone sealant around the rim before screwing on the lid tightly. If I’m using a more decorative container without a traditional lid, I might opt for clear epoxy resin instead. This not only seals the globe but also adds an extra layer of durability.
The Final Touches
As I pour in the resin, I watch in awe as it fills any gaps and creates a seamless finish. The anticipation builds as I realize that I’m nearing completion; soon, I’ll be able to admire my handiwork in all its glory.
Personalizing Your Snow Globe
One of the most enjoyable aspects of creating a snow globe is personalizing it to reflect my unique style and memories. After sealing everything in place, I often take some time to add personal touches that make my creation truly one-of-a-kind. This could involve incorporating small photographs or mementos that hold sentimental value—perhaps a tiny picture of loved ones or a cherished holiday card.
I also love experimenting with different embellishments like ribbons or decorative stones around the base of the globe. These details not only enhance its visual appeal but also tell a story about what inspired me during this creative process. Personalization allows me to infuse my personality into each piece, making it not just an object but a cherished keepsake filled with memories.
Displaying and Enjoying Your Creation
Finally, after all the hard work and creativity poured into crafting my snow globe, it’s time to display and enjoy my creation! Finding the perfect spot for it is always exciting; whether it’s on a mantelpiece during the holidays or as part of my year-round decor, each placement brings joy every time I pass by. The gentle shake that sends snow swirling around inside never fails to evoke feelings of nostalgia and warmth.
I often find myself sharing my creations with friends and family during gatherings or special occasions. Watching their faces light up as they admire my handiwork fills me with pride and satisfaction. Each snow globe tells a story—a story that reflects not only winter magic but also moments captured in time through creativity and love.
As I continue this delightful craft, I’m reminded that every snow globe holds within it a world waiting to be explored and cherished for years to come.
If you’re looking for some last-minute shopping ideas to add to your winter snow globe making supplies, check out this ultimate guide to quick finds on A to Z Cozy Corner. They have a variety of products that can help you create the perfect snow globe for the holiday season. And while you’re at it, don’t forget to browse through their blog for more crafting inspiration and tips. And if you’re looking to start the new year off on a healthy note, be sure to check out their wellness guide for 2025.
FAQs
What is a winter snow globe?
A winter snow globe is a decorative ornament that typically consists of a glass or plastic sphere filled with water and glitter, with a winter-themed scene inside. When shaken, the glitter swirls around, creating the illusion of snowfall.
How do you make a winter snow globe?
To make a winter snow globe, you will need a clear glass or plastic globe, winter-themed figurines or decorations, waterproof glue, distilled water, glycerin, and glitter. First, glue the figurines to the inside of the globe’s base. Then, fill the globe with a mixture of distilled water, a few drops of glycerin, and glitter. Finally, seal the globe tightly and shake to create the snowfall effect.
What are some popular winter-themed scenes for snow globes?
Popular winter-themed scenes for snow globes include snow-covered landscapes, cozy cabins, ice skaters, snowmen, and woodland animals. These scenes often evoke a sense of winter wonderland and holiday cheer.
Are there any safety considerations when making a winter snow globe?
When making a winter snow globe, it’s important to use waterproof glue to secure the figurines and ensure that the globe is tightly sealed to prevent leaks. Additionally, be cautious when handling glass globes to avoid breakage and potential injury. Keep in mind that snow globes are decorative items and should be kept out of reach of small children to prevent accidental ingestion of small parts.
 using WordPress and
No responses yet